Monitor Type Airflow Ridgevent


Get in Touch

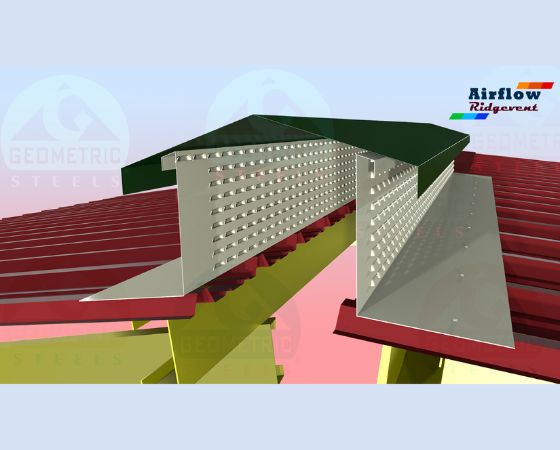
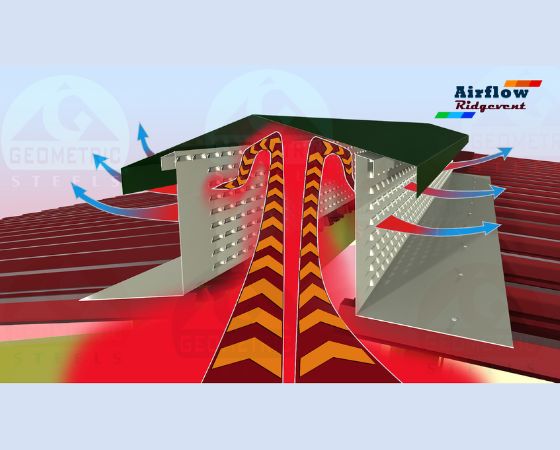
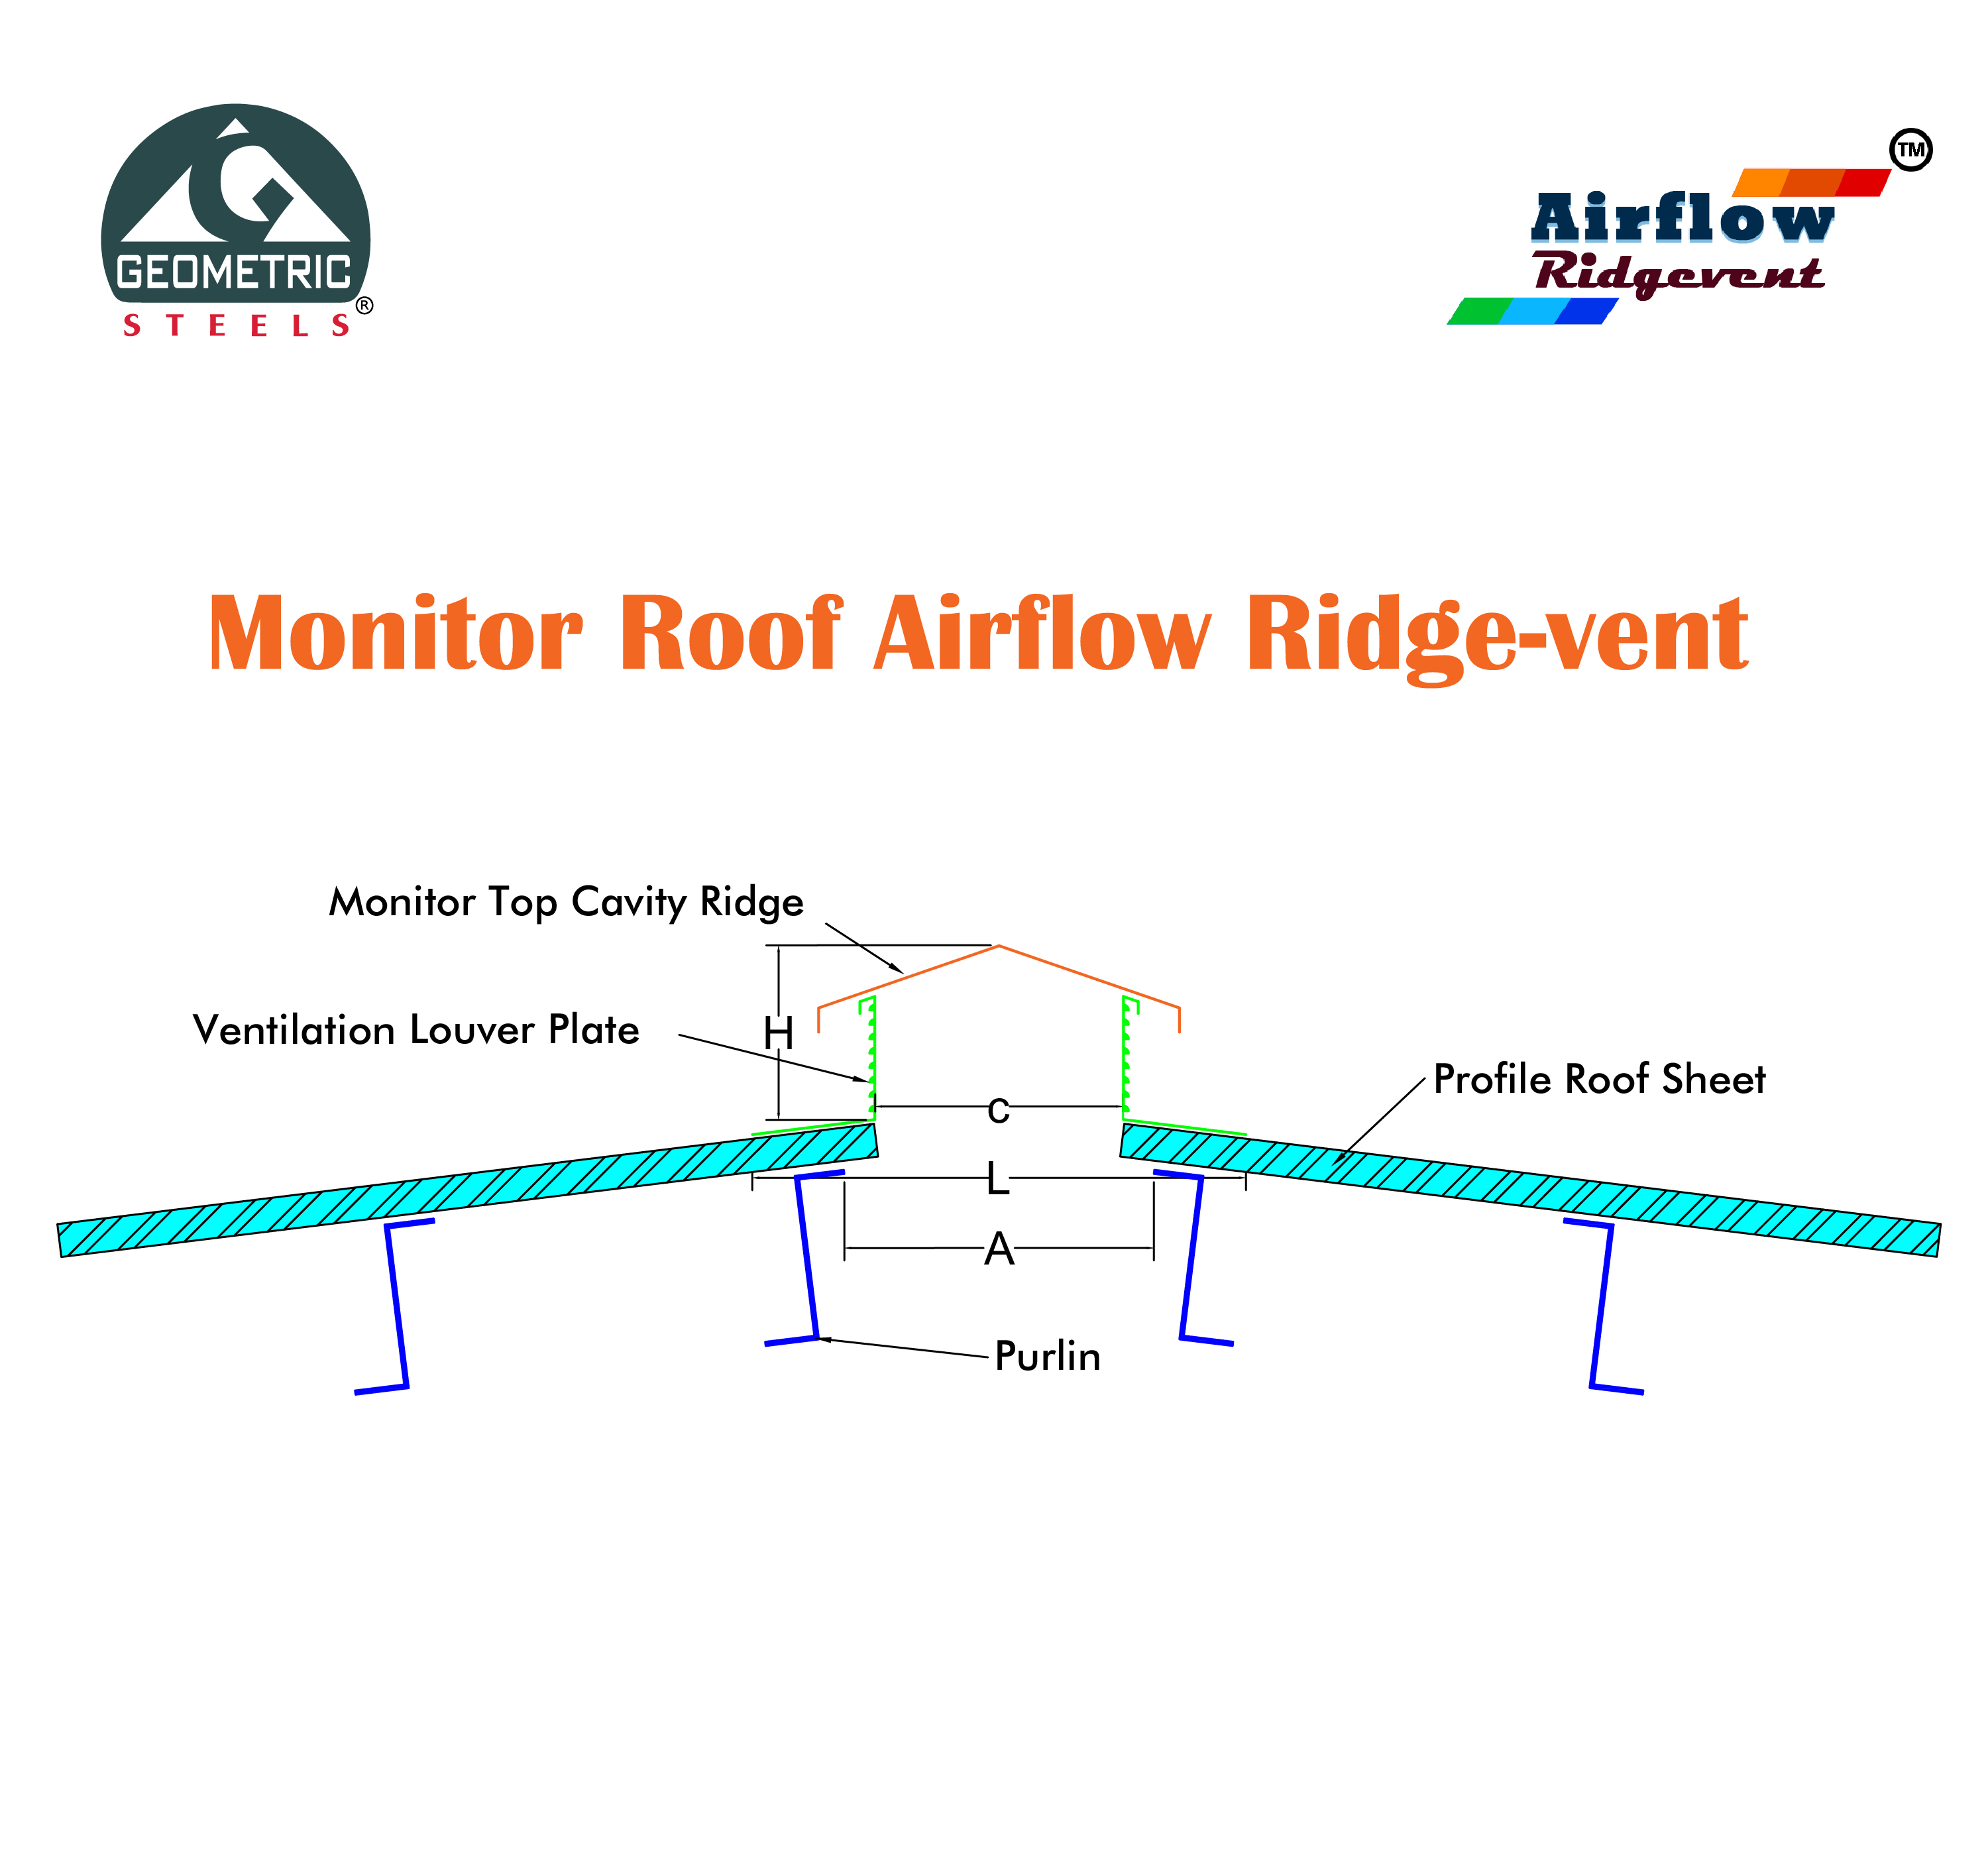
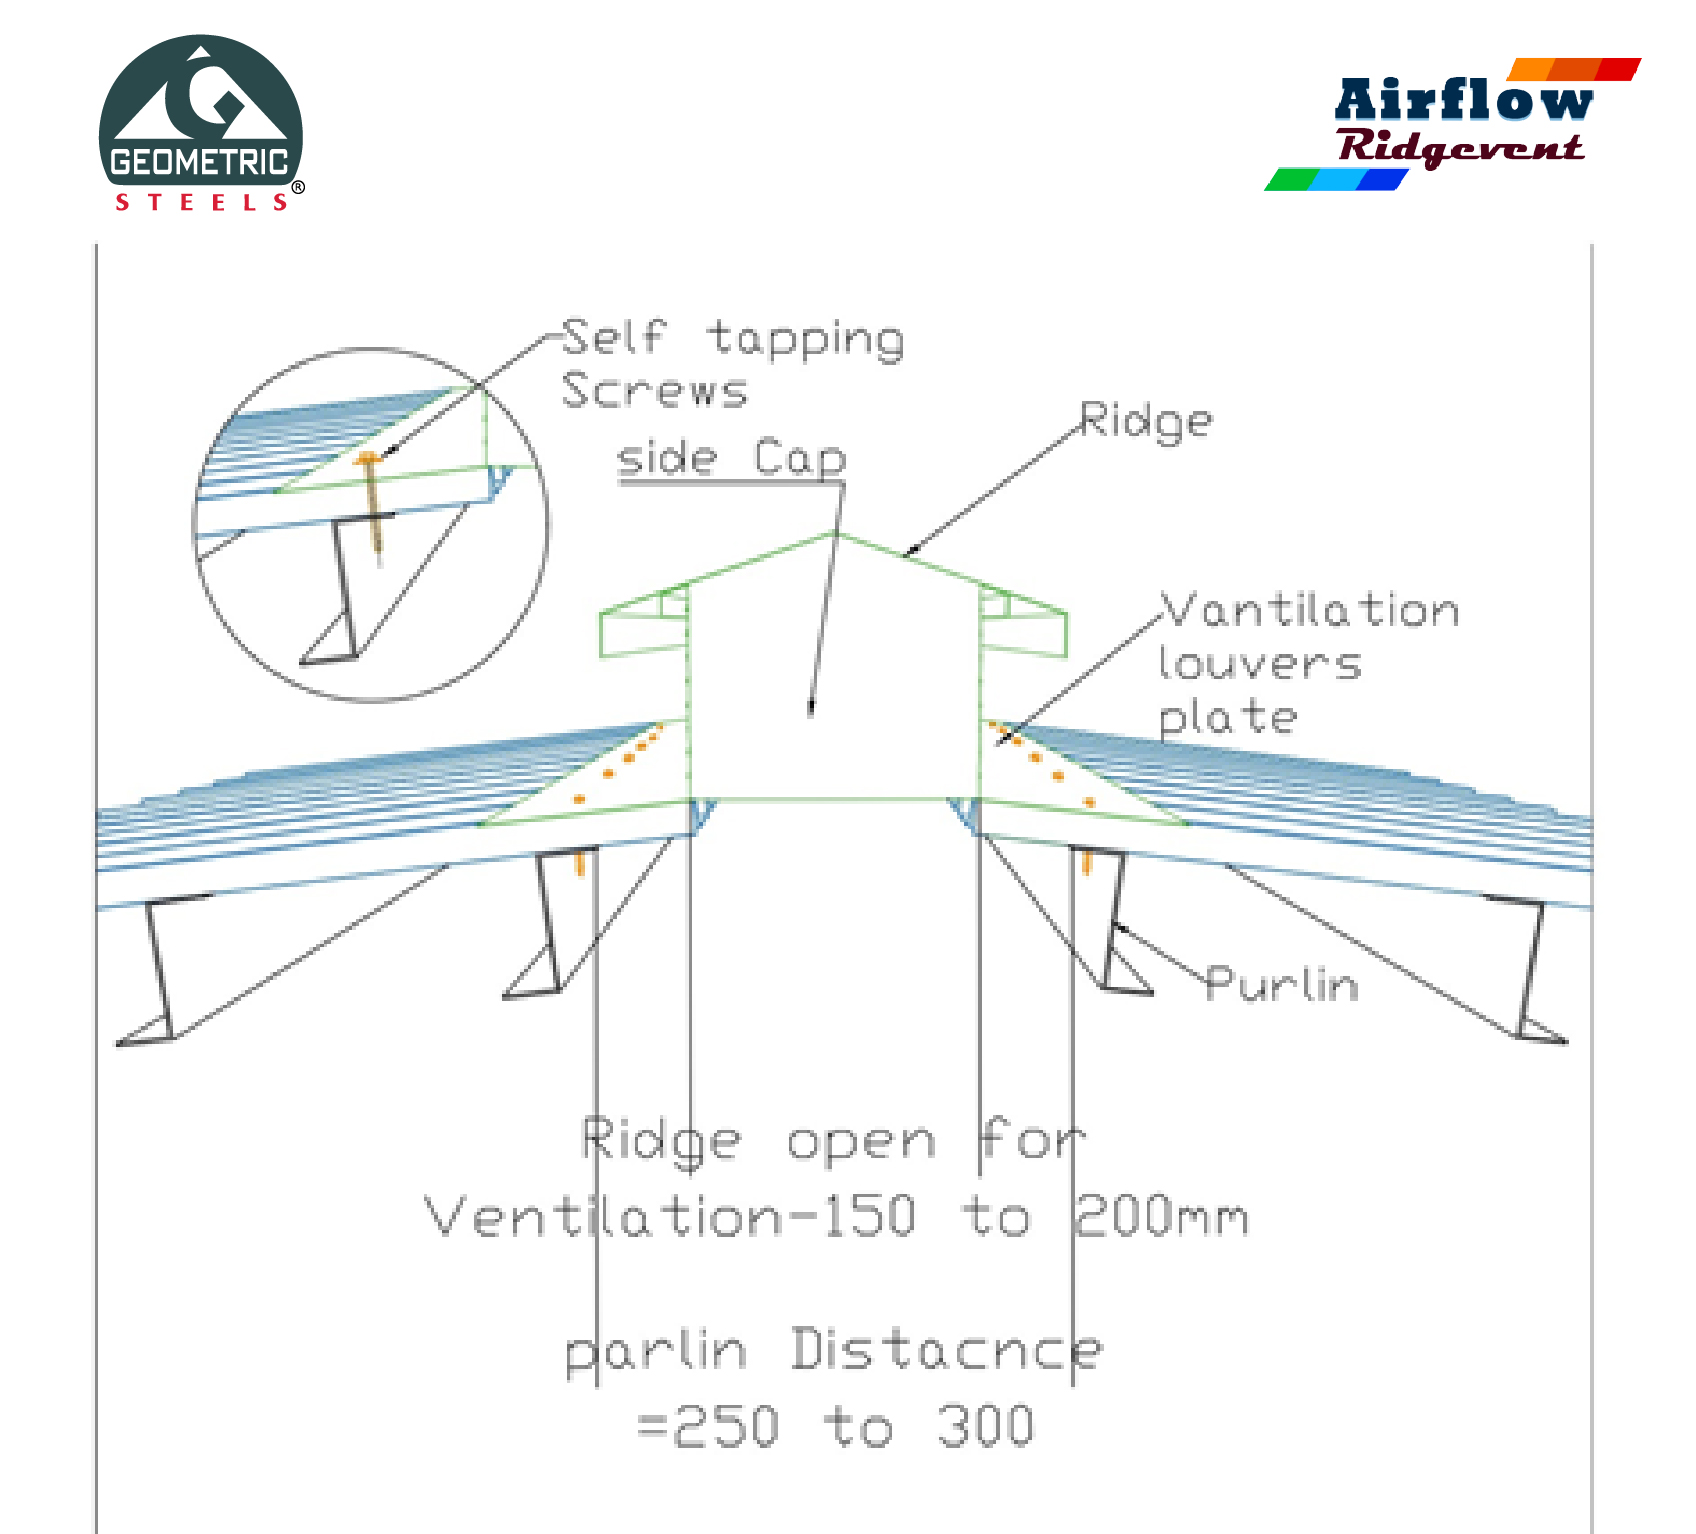
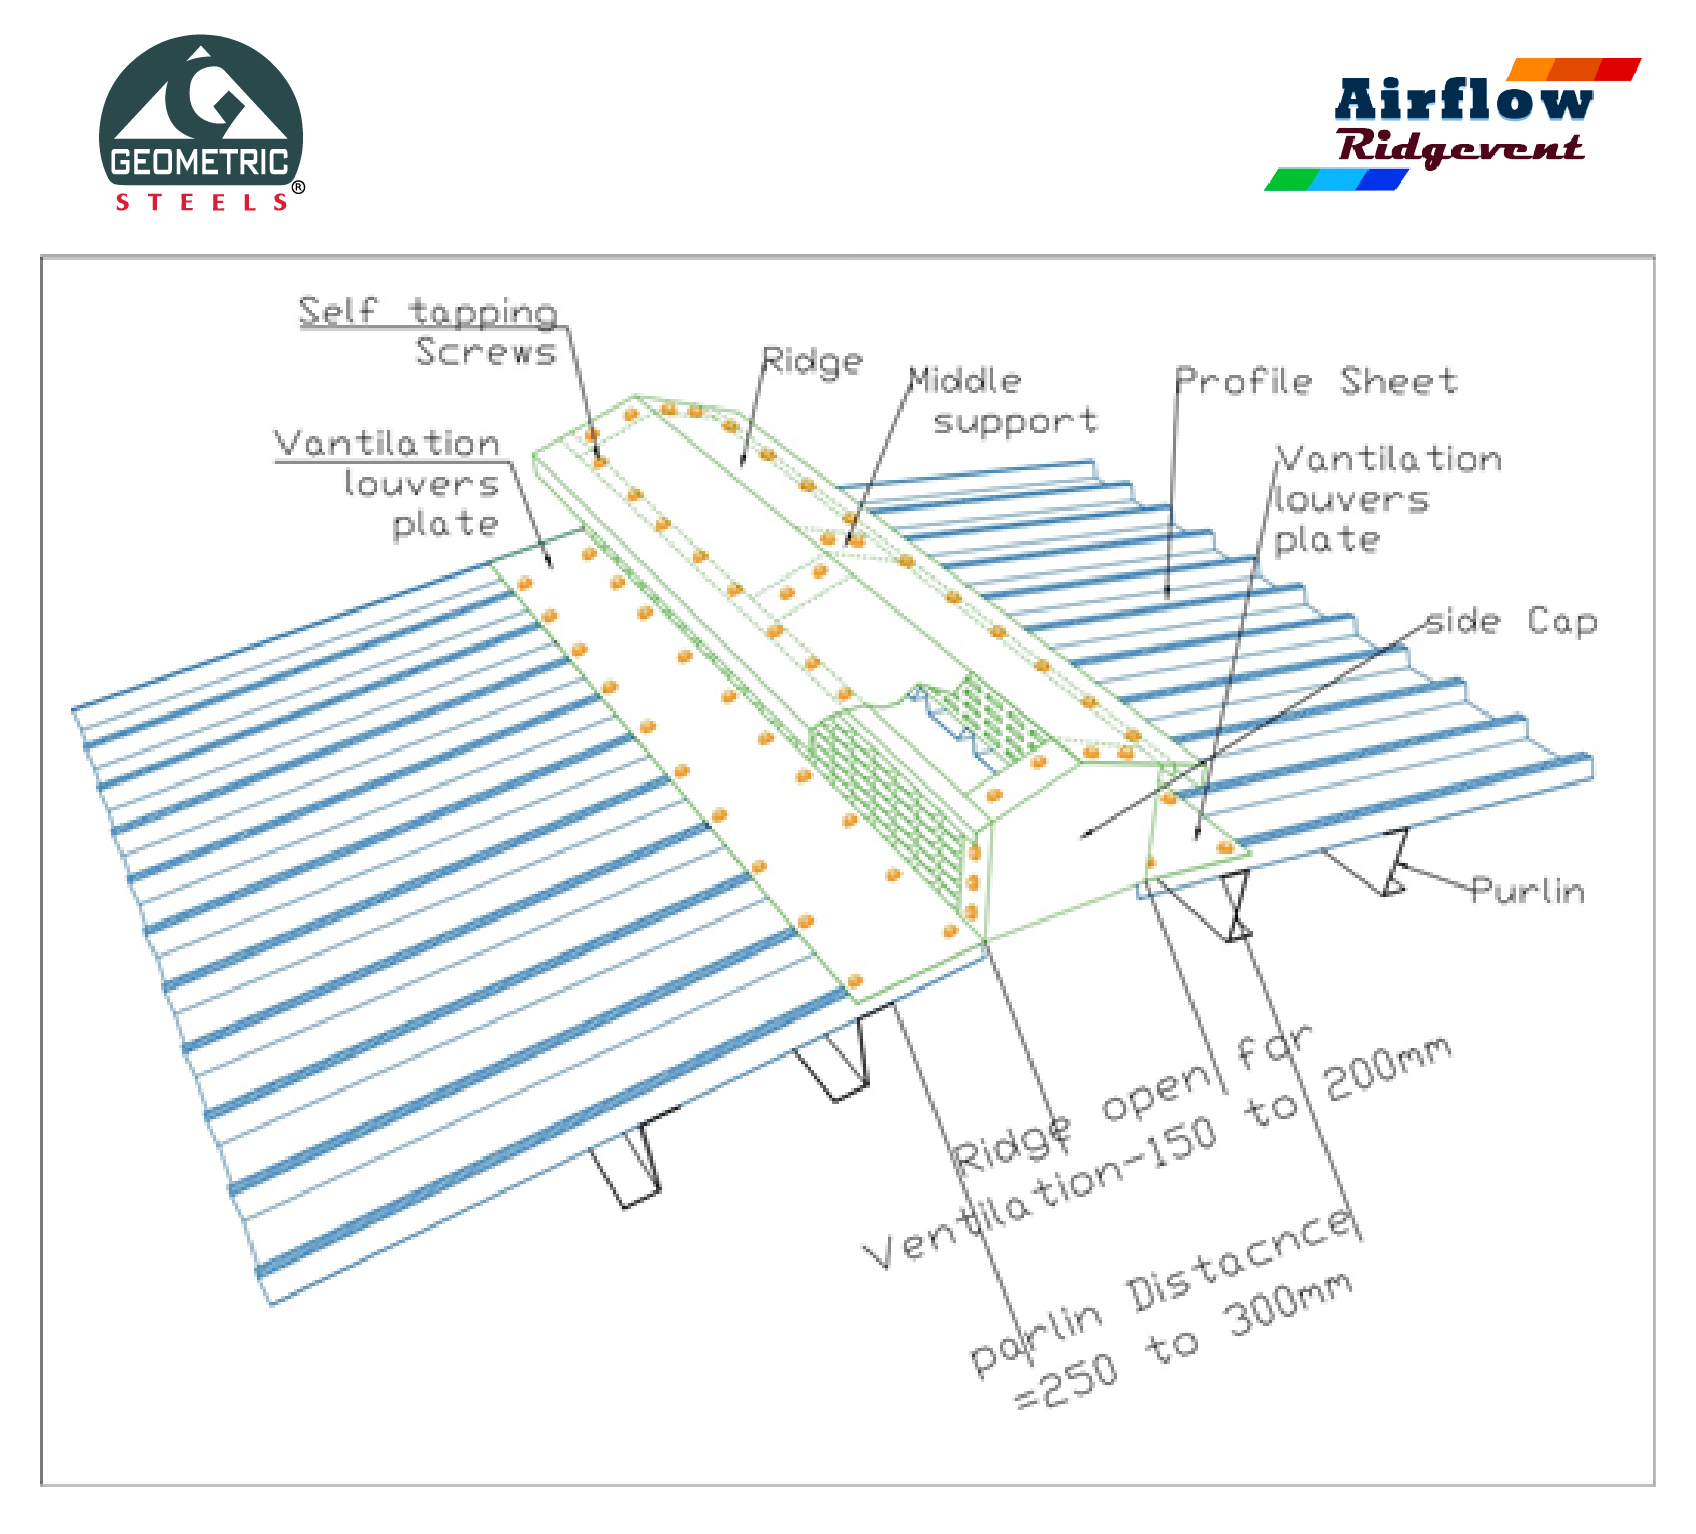
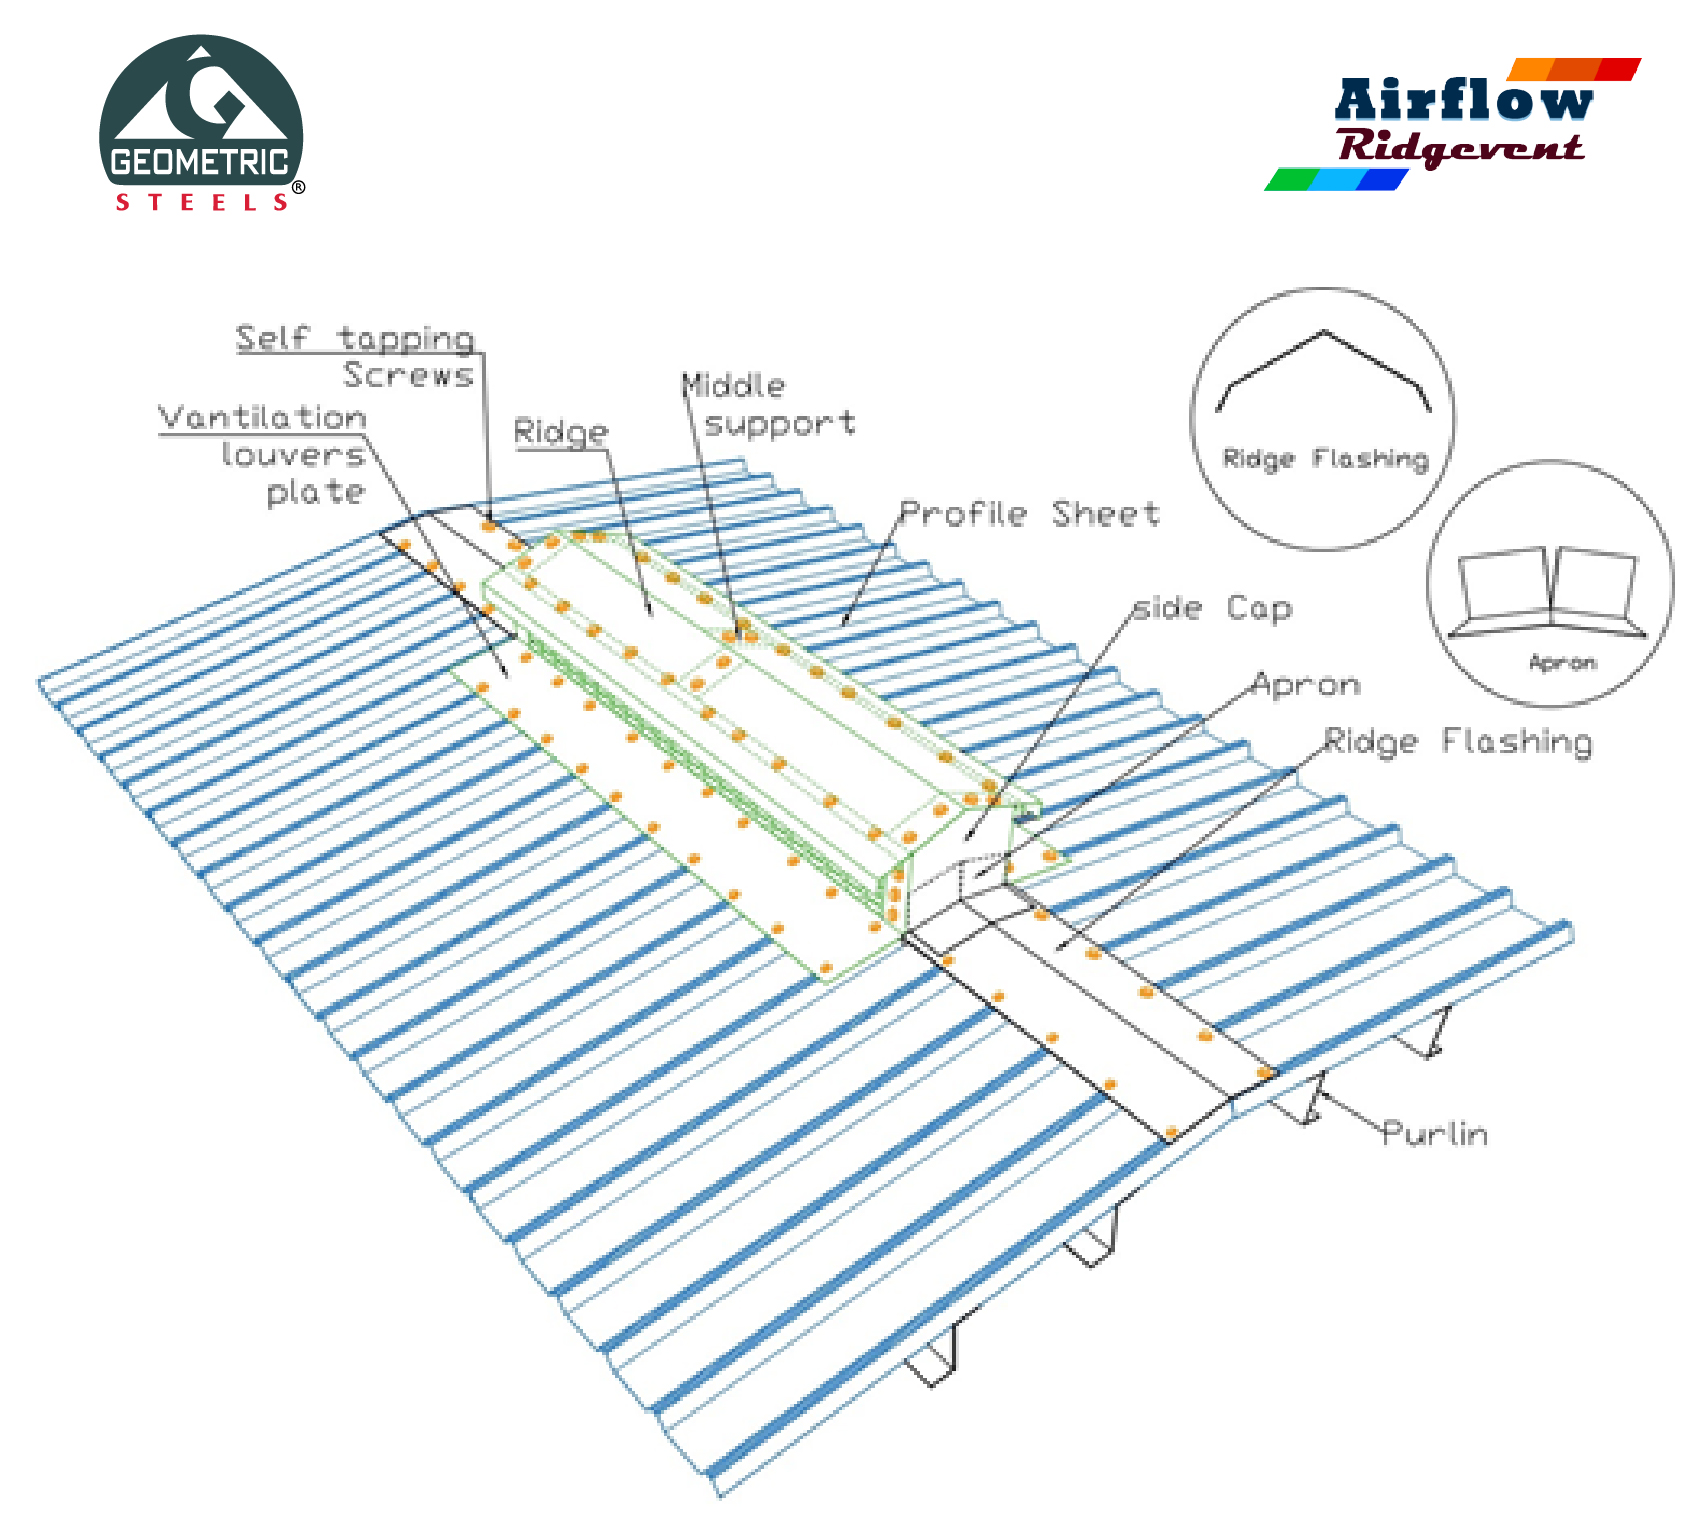
Monitor Type Airflow Ridge Vent Design

A Monitor-type Airflow Ridgevent that has two louvers that assemble vertically as exhaust plates as perpendicular system to the roof with a cavity Ridge that are colour coated galvanise. The Monitor type Airflow Ridgevent is pre pre-assembled device that can be installed on site directly

FEATURES AND BENEFITS

  • High natural airflow
  • Internal pressure of structures decreased.
  • The profiles are available as Colour coated steel as well as all roofing profiles
  • Improves & maintains a comfortable living environment
  • No power, moving parts, or noise
  • Maintenance-free (No clogging)
  • Maintains a clean, attractive roofline
  • Extends the life of the building through natural air circulation
  • They are located exactly in the area where they are most good, which is at the highest point on the rooftop. Projected at the apex of the roof for maximum air circulation
  • Easy to install on existing old roofing ALSO
  • Maximum effective utilization of space with an existing arrangement of structure.
  • Made in INDIA
Get in Touch
ridge vent 2

Throat (C) Purline Distance (A) (H) (L)
200 300 192 498
250 350 202 548
The Monitor type of Air Flow Ridgevent Throat Ridgevent
Pre-assemble unit to be installed on-site Directly On-site assembly
Lightweight no additional structural support is required Additional Support and arrangement required for installation
The highly effective and fast installation system Costly and time-consuming installation.
Maximum effective utilization of space with an existing arrangement of structure Bulky and separate structural requirement

Material: PPGI, PPGL, and Galvalume to match the colour combination of the existing roof

Get in Touch

INSTALLATION

ridge vent 3
ridge vent 4
ridge vent 5
  • Make sure that the that roof sheets are straight with no gaps between sheets prior to the installation of Airflow ridgevents of louvers, especially regarding hip cut sheets Maintain a minimum 150mm to maximum 200mm gap between sheet ends.
  • Roof sheets should not be raised
  • Slide louver over Airflow Ridgevent the end of the sheet until in correct position
  • Starting from the left end pull down firmly on the louver install with a metal self-tapping self-drilling screw through the top row of louver to hold in place
  • On the right end pull down firmly on the louver, install with metal self-tapping screw drilling through the top row of louver to secure in place
  • Install STSD screws in the bottom row of louver directly below top screws to ensure installation (each piece must have evenly spaced screws) as per manufacturer’s recommendations, seal right side join with silicon sealant to form an entire seal
  • Slide next airflow Ridgevent louver on an angle overlapping the previous louver until locked into place, pull down firmly and install 19mm/ 25mm screw/ rivet and continue as per previous steps (each piece must have eight screws) where joins do not meet on a sheet rib secure with two screws
  • Continue to place each Airflow ridgevent louver on each side of the topridge, and hips if needed.
  • Install ridge cap over fitted Airflow Ridgevent louver and secure to either batten or every second roof sheet rib.

“Airflow Ridgevent is located precisely where they do the most good”

Get in Touch
whatsapp

OUR CUSTOMERS